As an Amazon Associate, this website earns from qualifying purchases.
The best 3D printer for cosplay depends on the part you plan to make. Slice a real costume file at its final scale. Then compare its sections with the build space and permitted materials. Plan the joins and finish before choosing a machine.
#1. Bambu Lab A1
Bambu Lab A1
Our verdict:
Automatic calibration
Compare it for its stated build cube and automatic bed setup when the costume material is permitted.
View on Amazon - 256 × 256 × 256 mm build volume.
- Automatic Z-offset calibration and bed leveling.
- PLA, PETG, TPU and PVA listed as ideal.
Keep in mind: ABS, ASA, PC, PA, PET and carbon or glass fiber reinforced polymers are not recommended.
The A1 has a stated 256 × 256 × 256 mm build cube. It matches the P1S.
The listed ideal materials are PLA, PETG, TPU and PVA.
Before splitting a wearable part, decide where it needs to move. Keep access to the seams for gluing and finishing.
ABS, ASA, PC, PA, PET and carbon or glass fiber reinforced polymers are not recommended.
Multicolor printing requires AMS lite through a combo configuration or a separate purchase.
Bambu Studio is the listed slicer; third-party standard G-code slicers may lack some advanced features.
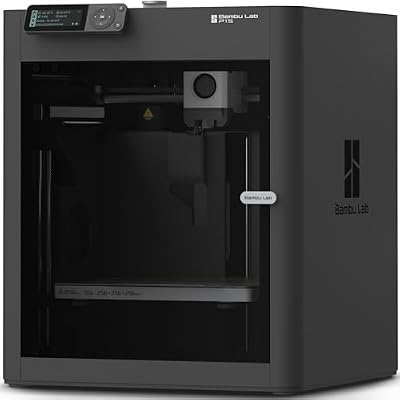
#2. Bambu Lab P1S
Bambu Lab P1S
Our verdict:
Enclosed printing
Compare it for a project that needs its documented ABS or ASA path; check the room and exact package.
View on Amazon - 256 × 256 × 256 mm build volume.
- Enclosed plastic and glass shell.
- ABS and ASA listed among ideal materials.
Keep in mind: Multicolor printing requires an AMS configuration, and a solo printer does not include every optional feeder.
The P1S has a stated 256 × 256 × 256 mm build cube. It matches the A1 and exceeds the 5M on each axis. The maker lists ABS and ASA as ideal for the P1S.
A larger build area may reduce the need for splits only when the intended component and its print orientation fit.
Check seams where the costume flexes or attaches to another part. The join is part of the design, not just a finishing task.
Multicolor printing requires an AMS configuration, and a solo printer does not include every optional feeder.
Carbon and glass fiber reinforced polymers are not recommended.
#3. Flashforge Adventurer 5M
- 220 × 220 × 220 mm build volume.
- CoreXY structure with automatic leveling.
- ABS series filaments are incompatible.
Keep in mind: The manufacturer states that ABS series filaments are incompatible.
The specified build volume is 220 × 220 × 220 mm, compared with 256 × 256 × 256 mm for both alternatives.
A split can let you make a larger assembled prop. Each section still has to fit in its sliced pose.
Each added seam needs alignment and joining. Leave access for the finish work.
The manufacturer states that ABS series filaments are incompatible.
The filament table specifies a 0.6 mm nozzle for TPU, while the included standard nozzle is 0.4 mm.
Factors to consider when choosing the best 3D printer for cosplay
Check part dimensions before choosing
Check each costume part in the right slicer profile. Use its final scale and intended pose.
A panel line or hidden edge may offer a useful place to split a large part. Check that you can reach the seam.
Account for joining effort and strength
Splitting a model adds alignment, joint preparation and assembly work to the project.
Check the shape of the join, its material and how it will be handled. Do not assume a joined shell acts like a single piece.
Reconsider a split if the seam would be inaccessible during assembly or cross an area that must flex.
Match material and nozzle
Check the manufacturer's filament guidance and whether the required nozzle is included before choosing a material.
Plan finishing access
Keep tool access around each seam. Where the design allows it, add fragile details after surface prep.
Check the glue or filler instructions for the chosen material. Check the coating guidance too. Plan the order before coating the full prop.
Allow space for the assembled component
Check printer installation clearances and allow room to align and assemble the completed costume component.
Plan surface preparation and coating space according to the products' handling instructions.
Check fit before a long costume print
Set the file to the wearer's required size before comparing printers. Check openings, attachment points and the room needed to move. A file that fits the plate may still make the wrong size costume part.
Use a small section or joint sample to check the proposed fit before a long job. This is a planning step, not a result from our own test. If the design uses pins, magnets or bought hardware, inspect those pockets and the part list as well.
Keep the sliced preview with the file version you plan to use. Inspect the support contacts and the face that will be visible. A pose that fits the cube can create more cleanup on the surface you care about. Compare the whole job, not just the model's longest edge.
Plan the work after printing
Lay out the assembled prop on your work surface before making all the sections. Mark the join order and leave access for clamps or other chosen tools. Do not close a shell before completing an inner joint that you cannot reach later.
Try the proposed finish on a spare piece of the same material. Check the coating maker's preparation and handling instructions. A smooth display sample does not prove that the same sequence will work on a flexible joint or a fine detail.
The beginner workflow guide covers the steps around a first job. Use the slicer guide to inspect the job, and the cost worksheet to count material for supports and repeat sections.
How We Picked
We checked the exact selected configurations for new US offers below this site's strict ceiling. We compared their supported features with the reader's task. The links refer to those configurations, so check the package before ordering. Offers can change.
We have not tested these products. Specifications do not establish measured finish, speed or suitability for every project. Use the exact maker instructions for the machine and material.
Verdict on the best 3D printer for cosplay
Choose the best 3D printer for cosplay around a real sliced part. Match its material and size, then plan the joins. A larger stated cube can help only if the part fits in a useful pose.